
Cheese Boards | How To Make A Stunning Cheese Board
How to assemble a cheese board / charcuterie board that is sure to impress:
This is a cheese board recipe that will give you the tools and ideas to create an epic cheese board. Sometime called a cheese platter or charcuterie board (referring to the cold cooked meats), either way it’s all delicious. In this post we will walk you through the steps of how to make a cheese board and give you the basic principle and tips of how to make a cheese board look attractive.
Honestly, who doesn’t like a platter filled with cheese, fruits, crackers, and meats? While no one will complain about you just throwing these cheese board ingredients on a plate, we want to show you how to put together a cheese board display that could fit in to any fancy occasion and wow your guests.

How to make a Cheese Board look attractive?
Making a cheese board look attractive comes down the right ingredients. The right cheese board ingredients are delicious, have vibrant and contrasting colors, different shapes and textures, and all pair well together. Then with the proper arrangement, you’ll find yourself with the ultimate cheese board.
Pin This Recipe! ↓↓↓

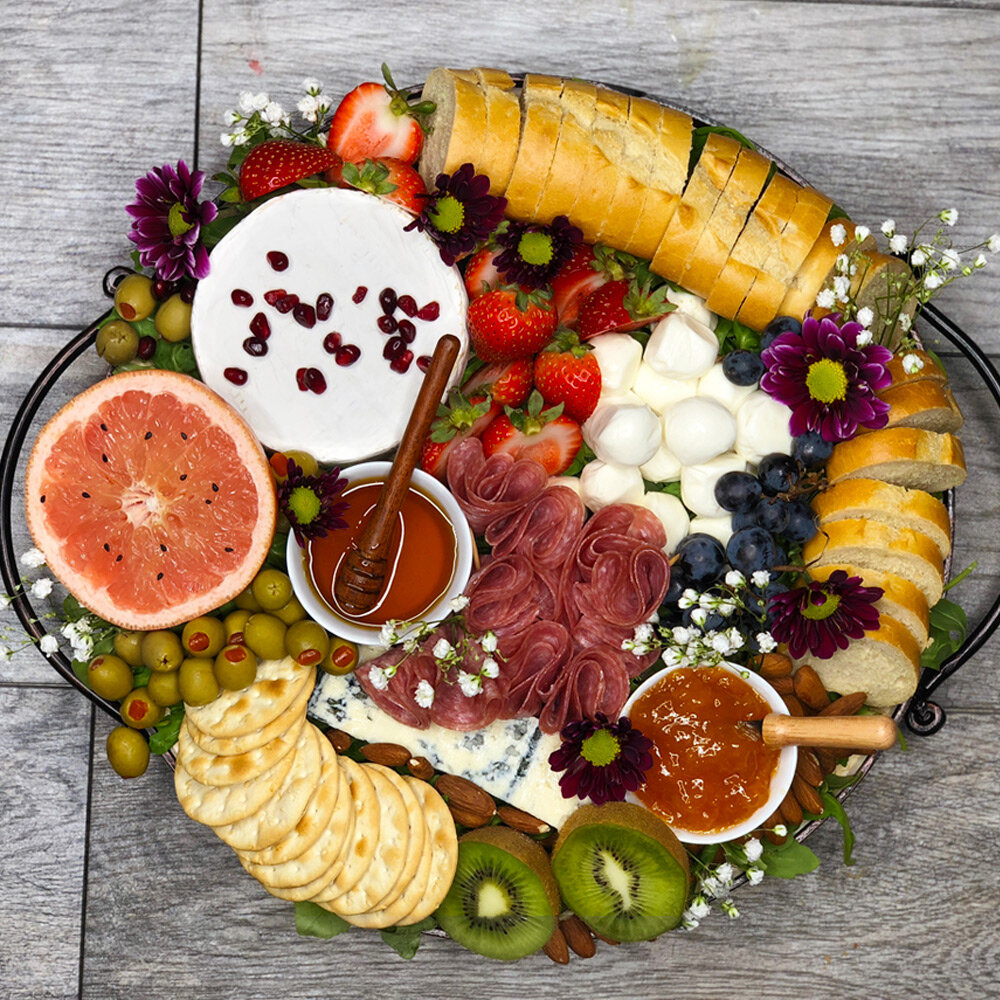
Cheese Board Ingredients:
Mozzarella Cheese Balls
Brie
Gorgonzola
Salami
Baby Arugula
Thin Sliced Baguette
Crackers
Honey
Jam
Almonds
Olives
Strawberries
Blue Concord Grapes
Kiwi
Grapefruit
Fresh Flowers
Pomegranate Seeds
These are just the ingredients we chose; there are plenty of other substitutes explained below.
Cheese Board Assembly:
How to arrange a cheeseboard
1. Step one involves picking a cheeseboard surface. There are so many options! You can use cake stands, cheese trays, cutting boards, large plates or even the table or counter itself if that suits your fancy! You can choose round, square, rectangular, triangular – it doesn’t matter.
For this tutorial we chose a round serving tray.
2. Start by picking a base ingredient; greens work well. Spread the base evenly to cover your cheeseboard surface.
We did: In this case we chose baby arugula.
Tip – This helps avoid ending up with any obvious, empty spaces.
3. Set your cheese on the board – choose multiple varieties. Place them apart from each other. These will help guide everything else you fill.
We did: Brie, Mozzarella Balls, Gorgonzola
Tip – Choose a fan favorite (like Mozzarella, Cheddar, Gouda)
Choose a soft/spreadable cheese (like Brie)
Choose one with a pop of color / texture ( like Blue cheese or Gorgonzola)
4. If you don’t know where to go next, start with the edge. Start outlining the circular surface with items you can line up such as sliced baguette or crackers to help define the shape.
We did: Baguette and Crackers
5. Add color with throughout with some vibrant fruit.
We did: Strawberries, Grapefruit, Grapes and Kiwis were our choices but you can add many others – such as blueberries, dragon fruit, dried fruit, oranges, star fruit, etc.
Tip: For small fruit like grapes and strawberries, place them in a bunch to create a stronger color pop.
6. Honey and Jams pair well with cheese and add a nice texture to your board. Be sure to place these in ceramic bowls or mason jars for an extra touch.
We did: Local Honey and Apricot Jam
7. What goes with every cheese board? Charcuterie. Any type of cold cooked meats add to the board. Keep the meats off if you want the board to be vegetarian!
We did: Sliced Salami
Tip: Fold salami four times onto itself to form a “flower” shape and pierce two together with a tooth pick so it holds its shape – this will make it more visually appealing (example in video).
8. Use smaller food products such as nuts and olives to fill in gaps between your larger items. The board will really start to come together by this point.
We did: Whole Almonds and Olives
9. Top it off with some fresh flowers to take the board up a notch and fill in any spaces that need a little pizzazz.
We did: Baby’s breath and a Small Bright Colored Flower
Final tip = Sprinkle some pomegranate seeds over the large brie surface so that it adds a pop of color and texture!
Voila! Your Cheese Board is ready to serve. Check out our video above to see our exact placements of the cheeseboard ingredients.
This article may contain affiliate links. As an Amazon Associate we earn from qualifying purchases at no extra charge to you; any products we link to are ones that we have decided to showcase, and all opinions are our own.
Please share your Cheese Board creations with us! Tag @TheOnlineFarmersMarket / #TOFMrecipes and we might just feature your Cheese Boards on our pages!
Check out our other Delicious Recipes
Check out the rest of The Online Farmers Market
Share with the buttons below!